Master the Basics: The Blueprint for Your First Expedition
Your debut motorcycle tour is more than just a ride; it is a rite of passage that transforms a “commuter” into a “traveler.” It’s a sensory overload of freedom and discovery, where the road becomes your classroom. However, the line between a legendary adventure and a logistical nightmare is thin. Mastery doesn’t come from speed; it comes from preparation. By understanding the fundamental “Do’s and Don’ts” before you kick-start, you ensure that the only surprises you encounter are the breathtaking views.
The Evolution of the First-Timer
In 2026, touring has shifted from “roughing it” to “smart adventure.” With better gear and digital tools, the barrier to entry is lower, but the physical demands of the road remain the same.
Why the “Basics” Matter:
- Safety vs. Risk: A tour isn’t a race. Knowing how to manage your energy levels is as important as knowing how to manage your throttle.
- The Mechanical Bond: On a tour, you and your machine are one. If you don’t understand your bike’s basic needs (chain tension, oil levels, tire pressure), the road will teach you the hard way.
- The Mental Game: Long-distance riding is 30% physical and 70% mental. Preparing for rain, cold, and fatigue beforehand prevents “decision fatigue” when you’re actually in the saddle.
What to Expect: The First-Tour Reality Check
Many beginners imagine endless sun-drenched highways. The reality often includes:
- Saddle Soreness: Even the best seats feel like wood after 6 hours.
- Weather Shifts: You might start in 35°C heat and end the day in a 10°C downpour.
- The “Zoned-Out” Effect: Highway hypnosis is real. Learning how to stay sharp is a core skill.
The “Shakedown” Rule
The most important thing you can do before your actual tour is a “Shakedown Ride.” * The Method: One week before your trip, pack your bike exactly as you plan to for the tour.
- The Goal: Ride for at least 100–150 km.
- The Result: You’ll quickly realize if your luggage is lopsided, if your riding gear chafes, or if the extra weight affects your braking. Adjusting these things in your driveway is easy; adjusting them on a mountain pass is a nightmare.
DO’s: The Essentials for Success
1. Pack Light, Pack Smart: The Balance of Power
On a motorcycle, every kilogram has a “handling tax.” Overpacking doesn’t just make you slower; it changes your bike’s center of gravity, making every hair-pin turn a struggle and every climb a strain on your engine. The goal is functional minimalism: carry exactly what you need to survive and troubleshoot, but not a gram more.
The “Ladakh Lesson”: Why Weight Matters
Many riders (myself included during my first Himalayan run) make the mistake of packing for “every possible scenario.” I quickly learned that an overstuffed bike leads to:
- Physical Exhaustion: Fighting a top-heavy bike for 8 hours a day will drain your energy by noon.
- The Unpacking Nightmare: Spending two hours every night digging for a charger and another two hours every morning repacking is the fastest way to kill the joy of the journey.
- Mechanical Stress: Extra weight increases the risk of rear-shock failure and wears out your brake pads significantly faster on steep descents.
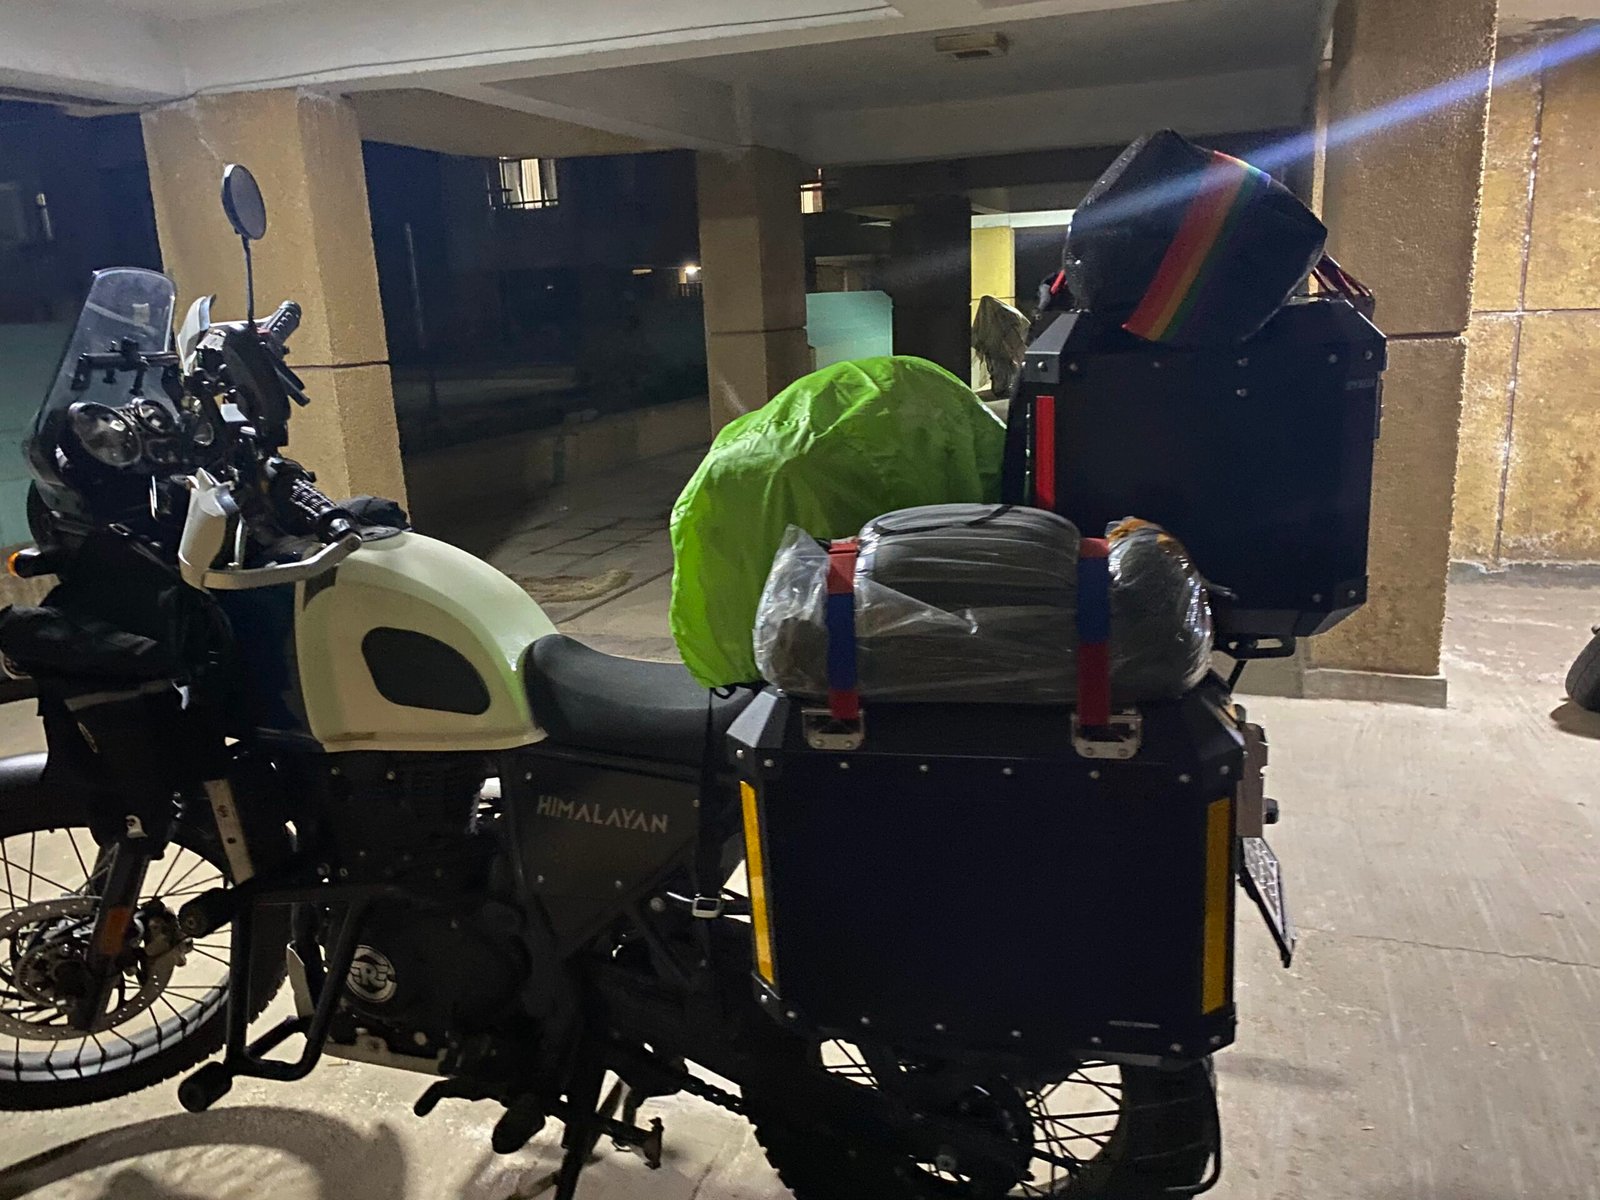
The Golden Rule: Ditch the Backpack
Never carry your luggage on your shoulders. A heavy backpack causes rapid spinal fatigue and can be dangerous in a fall. Instead, use:
- Saddlebags: Keep the weight low and balanced on either side of the rear wheel.
- Tail Bags: Perfect for lightweight items like clothes.
- Tank Bags: Ideal for “quick-access” items like your phone, wallet, and documents.1
The Essential “Light & Smart” Checklist
| Category | Must-Haves |
| The Essentials | Rain Gear: Accessible in seconds; Hydration Pack: To sip water without stopping. |
| Mechanical | Basic Tool Kit: Specific to your bike; Chain Lube: Apply every 500 km; Spare Key: Kept in your jacket, not on the bike. |
| Safety | First Aid Kit: Including altitude meds and bandages; Emergency Contacts: Printed and taped to your fuel tank. |
2. The ATGATT Philosophy: Your Personal Life-Support System
In the world of professional touring, we live by one acronym: ATGATT (All The Gear, All The Time). Your gear isn’t just a “look”—it is your primary defense against road rash, fractures, and the brutal Himalayan climate. In 2026, safety standards have evolved, making high-quality protection more breathable and comfortable than ever. Whether you are crossing a high-altitude pass or just riding 500 meters to a local café, the road doesn’t care about your distance—only your protection.Your riding gear is your best protection against the elements and the road. Therefore, always follow ATAG – all time, all gear policy. Accidents can happen anytime even on a casual trip to the service center or supermarket.
Why “Casual” is Dangerous
A common mistake is thinking, “I’m just going to the service center,” or “It’s too hot for a jacket today.” Most accidents happen within a few kilometers of home or camp when your guard is down. Safety is a habit, not an option.
The Must-Have Kit:
- Helmet: Do not settle for just “any” helmet. Ensure it is ECE 22.06 or ISI 2015 certified at a minimum. A full-face helmet is mandatory for touring to protect your jaw and reduce wind noise/fatigue.
- Armored Riding Jacket: Look for CE Level 2 protectors for the back, shoulders, and elbows. In 2026, many jackets feature high-airflow mesh for the plains and zip-in thermal liners for the mountains.
- Gloves: Proper riding gloves must have knuckle protection and palm sliders. Your instinct is to put your hands out during a fall; don’t let the road “erase” your palms.
- Boots & Knee Guards: Casual sneakers offer zero ankle protection. Use purpose-built riding boots with reinforced shins and heels. Pair these with high-quality, pivot-style knee guards if your pants aren’t already armored.
The Art of Layering (Climate Control)
Ladakh’s weather is a roller coaster. You might start a climb sweating at 25°C and reach the summit in a -2°C snowstorm.
- Base Layer: Moisture-wicking fabric (like Drifit) to keep sweat away from your skin.
- Mid-Layer: A fleece or thermal layer to trap body heat.
- Outer Layer: Your armored jacket to provide abrasion resistance and wind protection.
- The Rain Shell: Always keep a dedicated raincoat/pants over your gear; a wet rider is a cold rider, and a cold rider loses the reflexes needed to stay safe.

3. Route Intelligence: Navigating the Digital “Dead Zones”
In the wild expanses of regions like Ladakh or Sikkim, a GPS signal is a luxury, not a guarantee. Spontaneous riding is for the movies; professional touring is built on data. Planning your route in advance means more than just knowing the turns—it means identifying your “lifelines”: where you will eat, where you will sleep, and, most importantly, where you can find help if things go sideways.
The Strategy: Mapping Your Lifelines
When you are deep in the Himalayas, “network bars” disappear just when you need them most. Your preparation must happen before you lose signal.
1. The Offline Map Strategy
Google Maps is an incredible tool, but it’s useless without a data connection.
- The Fix: Open Google Maps, search for your entire route (e.g., “Manali to Leh”), and select “Download Offline Map.” This allows your phone’s internal GPS to track your location on the map even in airplane mode.
2. Identifying “Critical Points”
Don’t just look at the destination. Map out these three essentials every 100–150 km:
- Fuel Stations: In Ladakh, missing one petrol pump could mean being stranded for two days. Know exactly where the “last fuel” point is before entering remote valleys like Nubra or Spiti.
- Medical Facilities: Identify the nearest Army transit camps or District Hospitals. In high-altitude zones, knowing where the nearest Oxygen Cylinder or clinic is located is a critical safety step.
- Rest Stops: Fatigue is a silent killer. Mark “Dhabas” or rest points every 2 hours of riding to force yourself to take breaks.
The Digital Survival Kit
Ensure these apps are installed and updated before you leave the city:
- Google Maps (Offline): Your primary navigation.
- Highway Delite: Excellent for finding verified pit stops, clean washrooms, and hotels along Indian highways.
- mParivahan: Digital storage for your RC, Insurance, and DL. In 2026, Indian authorities accept these digital versions, saving you from carrying (and potentially losing) physical papers.
- Petrol Pump Finder: Useful for planning fuel stops in advance, though always cross-reference with local knowledge once you’re on the ground.
The “Analog” Backup Rule
Technology can fail—batteries die in the cold, and screens crack. Always carry a physical, printed route summary on a piece of paper. Write down:
- The names of the villages you will pass.
- Estimated distances between major checkpoints.
- Emergency contact numbers. Tuck this into your tank bag’s clear window. If your phone dies, you won’t be flying blind.
4. The Training Phase: Condition Your Body and Bike
Your first long-distance tour should not be the first time you test your limits. Touring is a physical discipline that requires “muscle memory.” If you wait until you’re on a steep Himalayan hairpin to learn how your bike handles with 30kg of luggage, you’re inviting disaster. Training isn’t just about riding; it’s about normalizing the extra weight and duration so that when the real journey begins, your focus remains on the road, not your nerves.
The “Pannier Trap”: Lessons from the Field
A common mistake—and one I’ve made myself—is buying brand-new luggage and heading straight for a 1,000km trip. On my first tour, the extra width and weight of fresh panniers made me incredibly nervous. I stalled multiple times on tight turns because I hadn’t practiced the “low-speed balance” required for a loaded bike.
What You Must Practice:
- The “Full Load” Handling: A bike with loaded saddlebags brakes slower and leans differently. Spend at least two weekends riding with your bags fully packed (even if you’re just going to the grocery store) to get a feel for the new center of gravity.
- The Pillion Factor: If you are riding with a partner, your braking distance doubles and your rear suspension will compress. Practice “emergency stops” in a safe parking lot with your passenger before hitting the highway.
- Saddle Endurance: You might be fine for an hour, but can you handle six? Use weekend “shakedown” rides to identify where you get stiff—be it your neck, lower back, or wrists—and adjust your handlebar or seat position accordingly.
Your Pre-Tour Training Checklist
| Skill to Practice | Why It Matters |
| Low-Speed U-Turns | Vital for narrow mountain roads. Practice these with your luggage on. |
| Emergency Braking | You need to know exactly how much “bite” your brakes have when the bike is heavy. |
| Standing on Footpegs | Essential for off-road or broken patches. Get comfortable balancing while standing. |
| The “8-Hour” Test | Ride for a full day on a weekend to test your mental focus and physical stamina. |
5. Listen to Your Body
Fatigue leads to mistakes. Take breaks every 100–150 km or when you feel tired.
Include:
- Stretching sessions
- Breathing breaks
- Hydration check-ins
Specially, on first day and last day of the ride. Riders rush and try to cover most. This is a huge mistake, always take break even if you are close to your destination, do not try to rush.
DON’Ts: Avoid These Rookie Mistakes
1. Don’t Skip a Bike Check
Pre-ride inspection is crucial. Always check:
- Tyre pressure & tread
- Oil & coolant levels
- Brakes
- Chain tension
- All lights & indicators
A loose chain or bad brakes can ruin your ride — or worse. I have seen many over-confident riders spoiling the tour with their bikes spilling oil or poorly serviced bikes breaking down in the mid-tour.
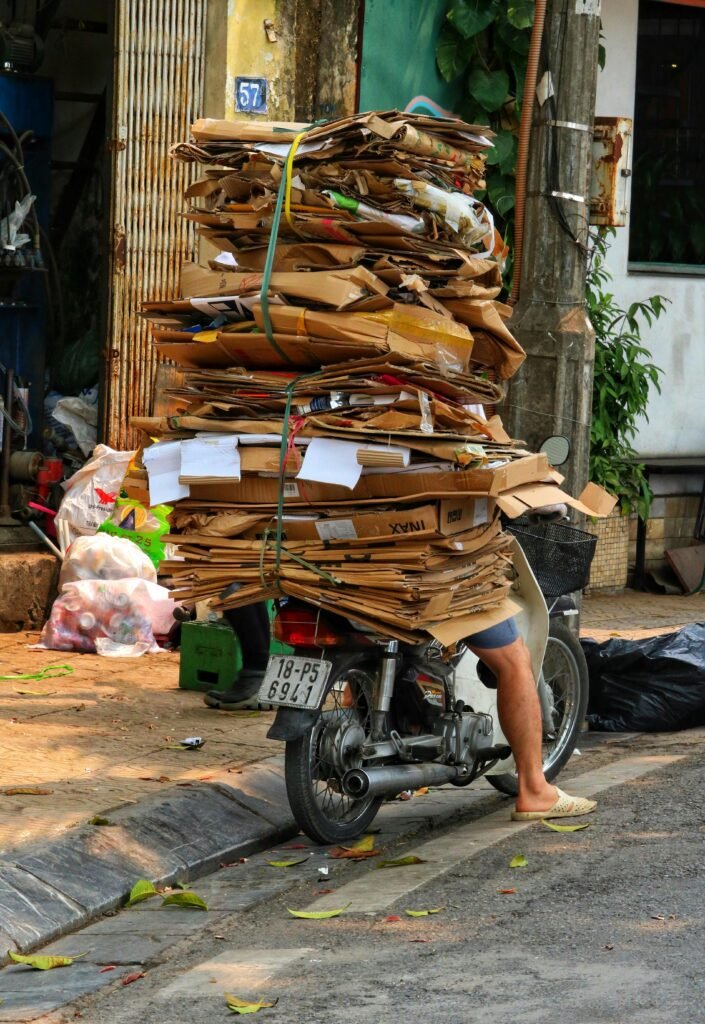
2. Don’t Overpack or Ride Unbalanced
Avoid heavy backpacks or overloaded tail racks — they stress your shoulders and reduce control.
Don’t carry:
- Bulky jackets you won’t wear
- Multiple footwear options
- Excess gadgets and chargers
3. Don’t Use Your Phone While Riding
For navigation, use a mobile holder with waterproofing. Pull over for calls or messages. Distractions are deadly.
4. Don’t Drink and Ride
Alcohol or even fatigue-induced drowsiness dramatically affects reaction time and judgment. Stay 100% alert.
5. Don’t Depend on Others’ Tools
Carry your own tool kit and spares. Don’t assume someone else will help. Be self-sufficient.
6. Don’t Ignore Weather Updates
Mountain rain or desert storms can flip your ride upside-down. Always check weather conditions for your route.
7. Don’t Be a Nuisance to Locals
Be respectful. Don’t rev unnecessarily, block roads, or disrespect local customs — especially in rural or tribal areas.
BONUS TIPS
- Carry a physical map or jot down turn-by-turn instructions.
- Inform someone of your route and expected arrival time.
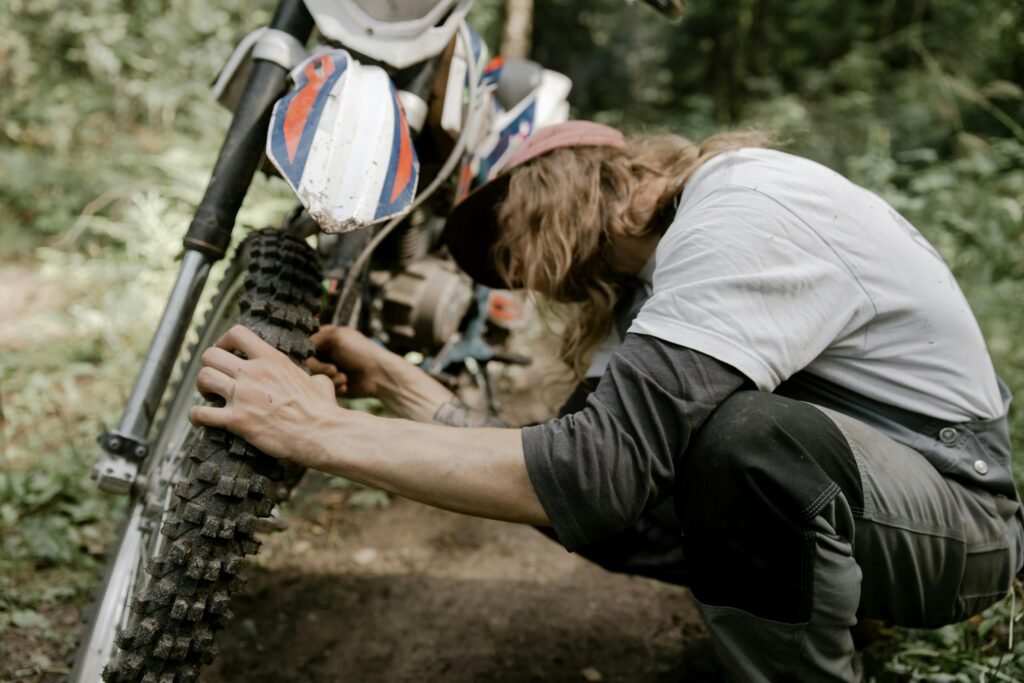
- Learn basic mechanical fixes like chain tensioning or puncture repair.
- Always fill up your tank when you find fuel — especially in remote areas.
Final Thoughts
Your first motorcycle tour is more than a ride — it’s a test of your planning, patience, and passion. Prepare well, ride safe, and respect the road. The freedom you’ll feel is unmatched — and the mistakes you avoid will make the memories more sweeter.

