Motorcycle journeys are filled with dramatic landscapes, raw emotion, and thrilling moments. But capturing these on camera isn’t always easy. Here’s how to do it right — from choosing the right gear to composition, safety, and editing tips.
1. Choose the Right Photography Gear
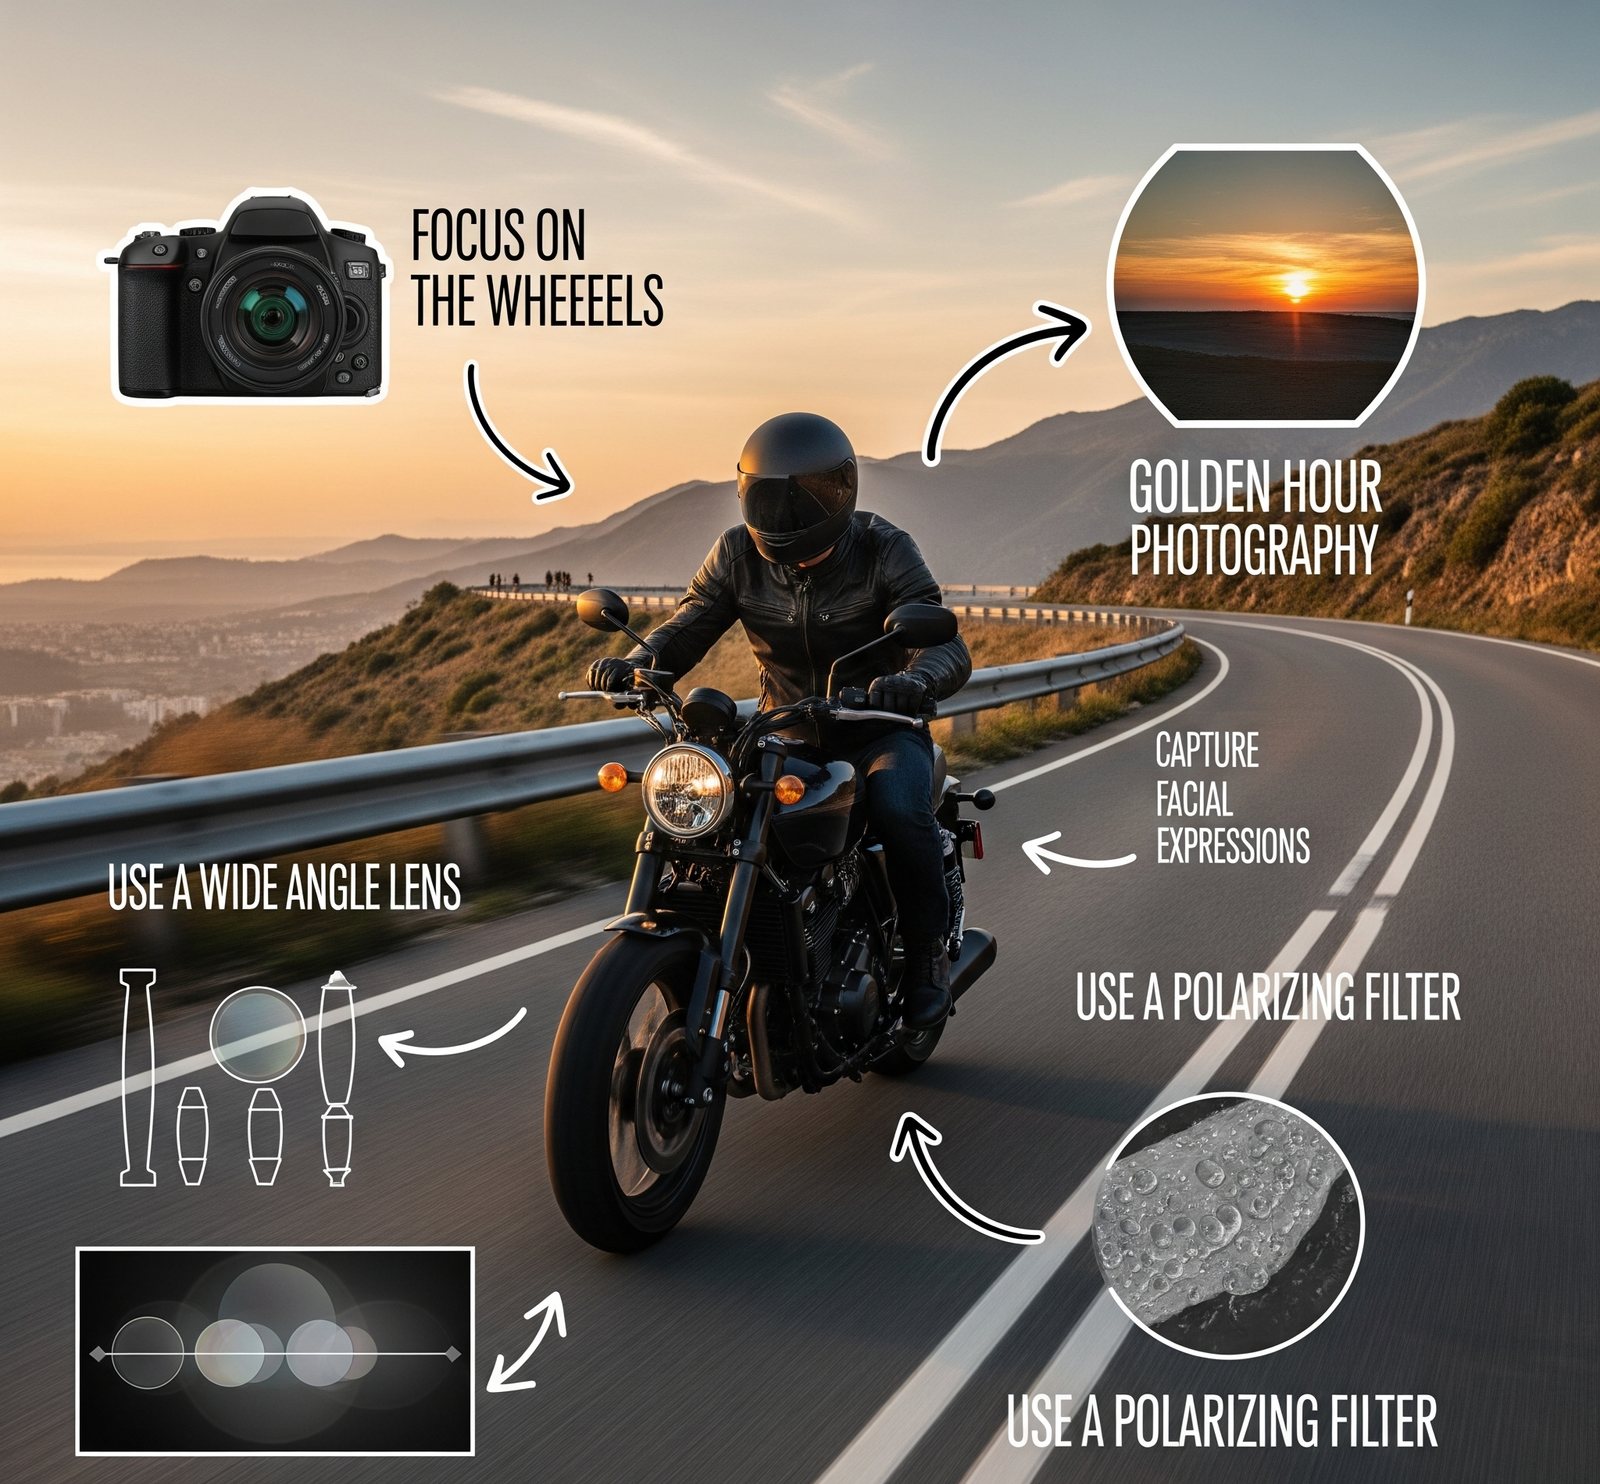
Why it matters: You need portable, durable gear that won’t weigh you down or break on rough rides.
Recommended Gear:
- Camera:
- Smartphones (iPhone 13+, Pixel, Samsung S series) – great for everyday travel shots.
- Action Cameras (GoPro, Insta360, DJI Osmo) – compact, mountable, waterproof.
- Mirrorless Cameras (Sony Alpha, Canon M series, Fujifilm X-T) – lightweight with DSLR-quality images.
- Accessories:
- Mini tripod / GorillaPod
- Camera tank bag or padded insert in saddlebag
- Power bank + extra batteries/memory cards
- Lens cleaning cloth
- ND filters (for motion blur shots in bright daylight)
2. Mounting Options for Action Shots
Why it matters: Capturing motion shots adds drama to your motorcycle story.
Safe & Stable Mount Positions:
- Helmet Mount: POV shots, immersive experience.
- Handlebar Mount: Ideal for road/ahead footage.
- Chest Mount: Stable and dramatic for off-roading.
- Rearview Mount / Tail mount: Capture the landscape behind you.
Always double-check mounts before starting — loose setups can lead to dangerous distractions or broken gear.
3. Lighting is Everything
Why it matters: Lighting determines mood, clarity, and overall quality.
Key Times:
- Golden Hour: 1 hour after sunrise or before sunset – soft, warm, magical light.
- Blue Hour: Just before sunrise or after sunset – dramatic and moody.
- Overcast Days: Great for portraits and bike close-ups (no harsh shadows).
Avoid mid-day sun — it creates harsh shadows and overexposure.
4. Composition Tips for Better Photos
Why it matters: Composition is the secret sauce that turns snapshots into great photos.
Quick Tips:
- Rule of Thirds: Place your subject off-center to create balance.
- Leading Lines: Use roads, fences, or shadows to guide the viewer’s eye to your motorcycle.
- Foreground Interest: Include rocks, grass, or your helmet to add depth.
- Frame the Subject: Use trees, arches, or tunnels to create natural frames around your bike or fellow riders.
- Silhouettes: Place your bike or rider in front of a strong backlight (sunrise/sunset) for dramatic effects.
📸 Practice framing your shots consciously — don’t just point and shoot.
5. Include People & Emotions
Why it matters: Your tour is not just about the machine or landscape — it’s about human experience.
Tips:
- Capture rider expressions, candid moments at dhabas, fueling up, or fixing a puncture.
- Take group photos at borders, signboards, and landmarks.
- Shoot self-portraits using tripods with timers or remote triggers.
📖 This adds narrative, emotion, and relatability to your travel album.
6. Safety First, Always
Why it matters: Great photos aren’t worth risking injury or damage.
Best Practices:
- Never shoot while riding alone. Ask a friend or use mounts.
- Pull over at a safe place before using handheld cameras or phones.
- Avoid obstructing roads — use lay-bys or wide shoulders.
- Always be visible to traffic when setting up shots.
Prioritize safety over social media likes.
7. Editing Makes a Difference
Why it matters: Editing helps bring out the full potential of your images.
Mobile Apps:
- Snapseed: Best for quick, high-quality edits.
- Lightroom Mobile: Professional-grade control.
- VSCO / Prisma: Creative filters and styles.
Key Adjustments:
- Brightness/Exposure
- Contrast & Clarity
- Crop for better composition
- Color temperature (warm/cool)
- Remove distractions using healing/clone tools
Be subtle. Let the photo tell the story — don’t overprocess it.
8. Tell a Story Through Photos
Why it matters: A trip album should be more than a folder of pretty pictures — it should say something.
Photo Story Checklist:
- Starting the journey: packed bike, GPS loaded, ready face.
- On the road: wide-angle road shots, candid rider moments.
- Landmarks and culture: local people, food, unique sights.
- End-of-day fatigue: dusty boots, sunset over the tent, tired smiles.
- Closing shot: reached destination, group high-fives or sunset with bike silhouette.
Sequence your photos into a story arc — start, middle, climax, end.
9. Care for Your Equipment on the Road
Why it matters: Dust, water, and vibrations are constant threats on a motorcycle tour.
Protection Tips:
- Keep silica gel packs in camera bags to reduce moisture.
- Use zip-locks or dry bags to store electronics during rains.
- Clean lenses daily — even your phone’s camera gets dusty fast.
- Wrap cameras in microfiber cloths while packing.
Tip: Avoid changing lenses in windy or dusty environments.
10. Geotag & Share Your Ride
Why it matters: Geotagging helps you track your route, share your journey, and revisit favorite spots.
Tools:
- Relive App / Google Timeline: Auto-log photos by location.
- Instagram + Hashtags: Use location tags + #MotorcyclePhotography, #RiderLife.
- Photo Map Tools: Apps like “Travel Mapper” allow photo plotting on custom maps.
Bonus: Create a “Photo Route Map” on your website for followers to relive your journey.
Optional: Upgrade Your Skills
- Take online courses in photography basics (Udemy, Skillshare).
- Follow photographers like @ItchyBoots, @KTMAdventure, @MotorcyclistMag.
- Join forums or local photography rider groups to practice and learn.

