A successful motorcycle expedition is won or lost long before the engine first roars to life. While the allure of the “unplanned” journey is romanticized in movies, the reality of high-altitude passes and remote borderlands is unforgiving. True freedom on two wheels is actually the product of meticulous preparation. Whether you are heading out for a 200km weekend escape or a 2,000km trans-Himalayan odyssey, your level of preparedness dictates your safety. I have witnessed countless riders join tours under-prepared—mentally, physically, or mechanically—only to become a liability to themselves and the group, often being forced to abandon their dream and turn back halfway.
Why “Wing It” Fails: The Cost of Under-Preparation
Planning isn’t about removing adventure; it’s about removing preventable failure.
- The “Ripple Effect”: One rider with a worn-out chain or a lack of physical stamina doesn’t just suffer alone; they slow down the entire pack, force dangerous night-riding to make up for lost time, and drain collective morale.
- The “Halfway Home” Syndrome: Most riders who quit mid-tour don’t do so because of a crash; they quit because of cumulative stress. A combination of bad gear, poor route timing, and mechanical anxiety eventually outweighs the joy of the ride.
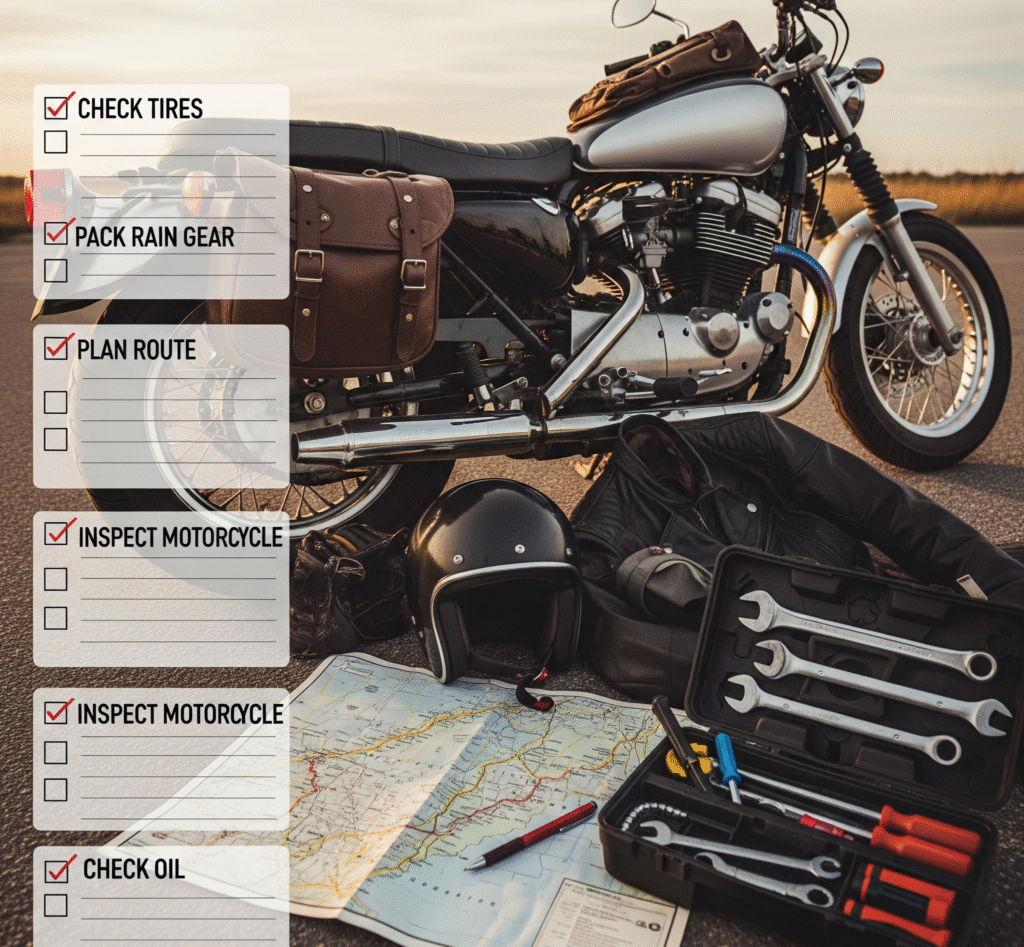
The Step-by-Step Blueprint for a Flawless Journey
To ensure your journey is “unforgettable” for the right reasons, follow this structural hierarchy of planning:
Phase 1: The Strategic Blueprint (The Route & Timing)
- The “Buffer” Logic: Never plan a route based on your best-case speed. If Google Maps says 6 hours, plan for 9. Mountain roads are dynamic; a single landslide, a flock of sheep, or a military convoy can add hours to your day.
- Terrain Scouting: Research the “Surface Quality.” Knowing whether a stretch is tarmac, loose gravel, or deep slush (like the infamous Rohtang slush) allows you to choose the right tires and mental approach.
Phase 2: Technical Hardening (The Machine)
- Beyond the “Oil Change”: A pre-tour service should be an “interrogation” of the bike. Check the “wear-and-tear” items: brake pad thickness, chain sprocket health, and battery voltage.
- The Spares Strategy: Carry the “Big Three”—a clutch cable, an accelerator cable, and a spare tube (or puncture kit). These are the most common “trip-enders” that are easily fixed with a bit of foresight.
Phase 3: Human Optimization (Body & Mind)
- The Endurance Mindset: As discussed in our health guide, start your physical conditioning 4 weeks early. If you haven’t spent 6 hours in a saddle in the last six months, your body will revolt on Day 2.
- Mental Simulation: Review your maps until you can visualize the turns. Knowing where the “point of no return” is regarding fuel and daylight reduces mid-ride anxiety significantly.
Phase 4: The Gear Ecosystem
Environmental Shielding: Your gear is your “habitat.” Ensure your waterproofs are actually waterproof and your helmet visor is scratch-free. Visual clarity is your primary safety feature when riding through rain or dust.
1. Strategic Navigation: Selecting Your Terrain and Path
The foundation of a legendary tour is a route that matches your current skill level while pushing your boundaries just enough to be rewarding. A common mistake is choosing a destination based purely on a “bucket list” without auditing the technical difficulty involved. In 2026, the digital tools at our disposal allow for a “digital scout” of the entire journey before the tires touch the dirt. A well-planned route isn’t just a line on a map; it is a calculated sequence of fuel windows, weather windows, and safety exits.
The Critical Factors of Selection
- The Skill-to-Terrain Ratio: Be brutally honest about your experience. High-altitude passes or the “Black Ice” of early winter are not the places for a beginner to learn. If you are new to touring, start with coastal roads or well-paved highways. Pushing into technical off-roads without the requisite muscle memory leads to “Panic Braking” and early exhaustion.
- The “Live” Road Condition: Maps are static; mountains are dynamic. Use Google Maps to check for “Red Lines” (traffic/stoppages), but cross-reference them with Rider Forums and Telegram Groups. These communities provide real-time updates on bridge washouts, landslide clearances, and road construction that hasn’t hit the mainstream satellites yet.
- Climate Intelligence: Weather in the mountains is a tactical player. Riding into a peak monsoon in the Western Ghats or a snow-bound pass in the North requires specialized gear and a different riding style. If you aren’t prepared to handle 10 hours of soaking rain or sub-zero winds, adjust your dates.
- The Logistics Chain: Map your “Point of No Return”—the last fuel station or mechanic before a desolate stretch. In remote areas, food and accommodation aren’t just comforts; they are necessary rest-stops that prevent the fatigue that leads to accidents.
The Digital Scouting Toolkit
| Tool | Best Use Case |
| Google Maps (Offline) | Your baseline. Always download “Offline Areas” because GPS works when the internet doesn’t. |
| Kurviger / REVER | Specifically designed for bikers. They prioritize “Curviness” over the fastest route, helping you find those hidden, winding backroads. |
| Locus Maps | The gold standard for off-roaders. It provides detailed topographical data and supports GPX files for trail riding. |
| YouTube Vlogs | Search for videos uploaded within the last 30 days of your specific route to see the actual visual condition of the road surface. |
Pro-Tip: The “Plan B” Architecture
Roadblocks, military movements, or sudden weather shifts can shut down a highway in minutes. Never head into a remote region with only one way out.
- The fix: Identify “Safety Exit” routes every 100km. If the main pass is blocked, know exactly where the nearest town with a hospital and a hotel is located. Having a Plan B isn’t “expecting failure”—it’s ensuring that a detour becomes a new adventure rather than a crisis.
2. Mechanical Hardening: Transforming Your Bike into an Expedition Vessel
Your motorcycle is more than just a vehicle; in the wilderness, it is your life-support system. A mechanical failure in a remote mountain pass isn’t just an inconvenience—it’s a safety hazard that can leave you stranded in sub-zero temperatures. “Tour-ready” means moving beyond a basic wash and polish to a state of technical peak performance. Every component must be interrogated for its “remaining life” to ensure the bike doesn’t just start the journey, but has the stamina to finish it without a single hiccup.
The Pre-Tour Inspection Checklist
Don’t just look at the bike; test the integrity of every vital system:
- The Contact Patch (Tyres): Check for more than just air. Inspect the “Tread Depth” for wear indicators. If your tyres are at 40% life, replace them before a 2,000km trip. High-altitude gravel will shred thin rubber, and you don’t want to be hunting for rare tyre sizes in a remote village.
- The Drivetrain (Chain & Sprockets): A “loose” chain is a dangerous chain. Check for “tight spots” and ensure the sprockets aren’t “hooked” (pointed like shark teeth). Clean and lubricate it thoroughly—this is the “spine” of your bike’s power delivery.
- Stopping Power (Brakes): Inspect the thickness of your brake pads. Long descents in the mountains cause “brake fade” and rapid wear due to heat. If the pads are thin, swap them now. Also, check the color of your brake fluid; if it’s dark tea-colored, it’s time for a flush.
- The Lifeblood (Oil & Coolant): Ensure your oil is fresh. If you are halfway through your service interval, change it anyway. Fresh oil handles the high-heat stress of mountain climbs much better. Check your coolant levels to prevent overheating during slow, high-torque crawls.
- The Nervous System (Electrics): Modern bikes rely heavily on the battery. If yours is over two years old, get a “Load Test” done. Ensure every indicator, the high-beam, and the horn are functioning—communication is vital on narrow, blind mountain curves.
The “Survival” Spares Kit
You cannot carry a whole garage, but you must carry the “Trip-Savers”—small parts that commonly fail:
| Category | Item | Why? |
| Mechanical | Clutch & Accelerator Cables | Cables often snap under the stress of constant shifting on hairpins. |
| Electrical | Fuses & Spark Plug | A blown 10-amp fuse or a fouled plug can stop a bike instantly. |
| Emergency | Puncture Kit & Portable Pump | The most common roadside delay. Knowing how to plug a tyre is a mandatory skill. |
| Hardware | Zip Ties & Duct Tape | The “Universal Fix” for loose fairings, broken levers, or flapping luggage. |
| Fluid | Chain Lube | Needs to be applied every 500km (or every evening) to prevent rust and wear. |
Pro Tip: The “Mechanic’s Window”
Never take your bike to the mechanic the day before you leave. Visit your trusted workshop 5–7 days prior. This creates a “buffer zone” to source rare parts if a hidden issue is discovered. More importantly, it gives you 100km of local riding to ensure the mechanic’s “fixes” are stable. New brake pads need to be “bedded in,” and a fresh oil filter needs to be checked for leaks before you’re 500km from home.
3. The Art of Packing: Balancing Utility and Agility
Packing for a motorcycle tour is a game of compromise where “less is almost always more.” On a bike, every extra kilogram affects your center of gravity, braking distance, and fuel efficiency. The goal is to create a self-contained ecosystem that protects you from the elements without turning your motorcycle into a top-heavy, unmanageable ship. In 2026, the secret to professional-grade packing lies in modular organization and weight distribution, ensuring that your essentials are accessible and your bike remains flickable in the corners.
The Essential “Survival” Manifest
Your packing list should be divided into high-performance categories:
- Climate-Adaptive Clothing: Forget heavy denims and cotton. Use Quick-Dry / Moisture-Wicking tees that can be washed and dried in a hotel room overnight. If heading into the mountains, Thermal Innerwear is your best friend—it provides maximum warmth with minimum bulk. Always have a dedicated Rain Layer accessible at the very top of your bag.
- The Power Grid: In the era of digital navigation, a dead battery is a safety risk. Carry a high-capacity Power Bank, ruggedized charging cables, and a multi-port wall charger. A Headlamp is superior to a handheld torch because it keeps your hands free for roadside mechanical repairs or setting up a tent in the dark.
- The “Paper” Safety Net: Even in a digital world, physical copies of your License, Registration, Insurance, and PUC are mandatory for remote checkpoints. Keep them in a waterproof “Ziploc” bag tucked into your jacket or tank bag.
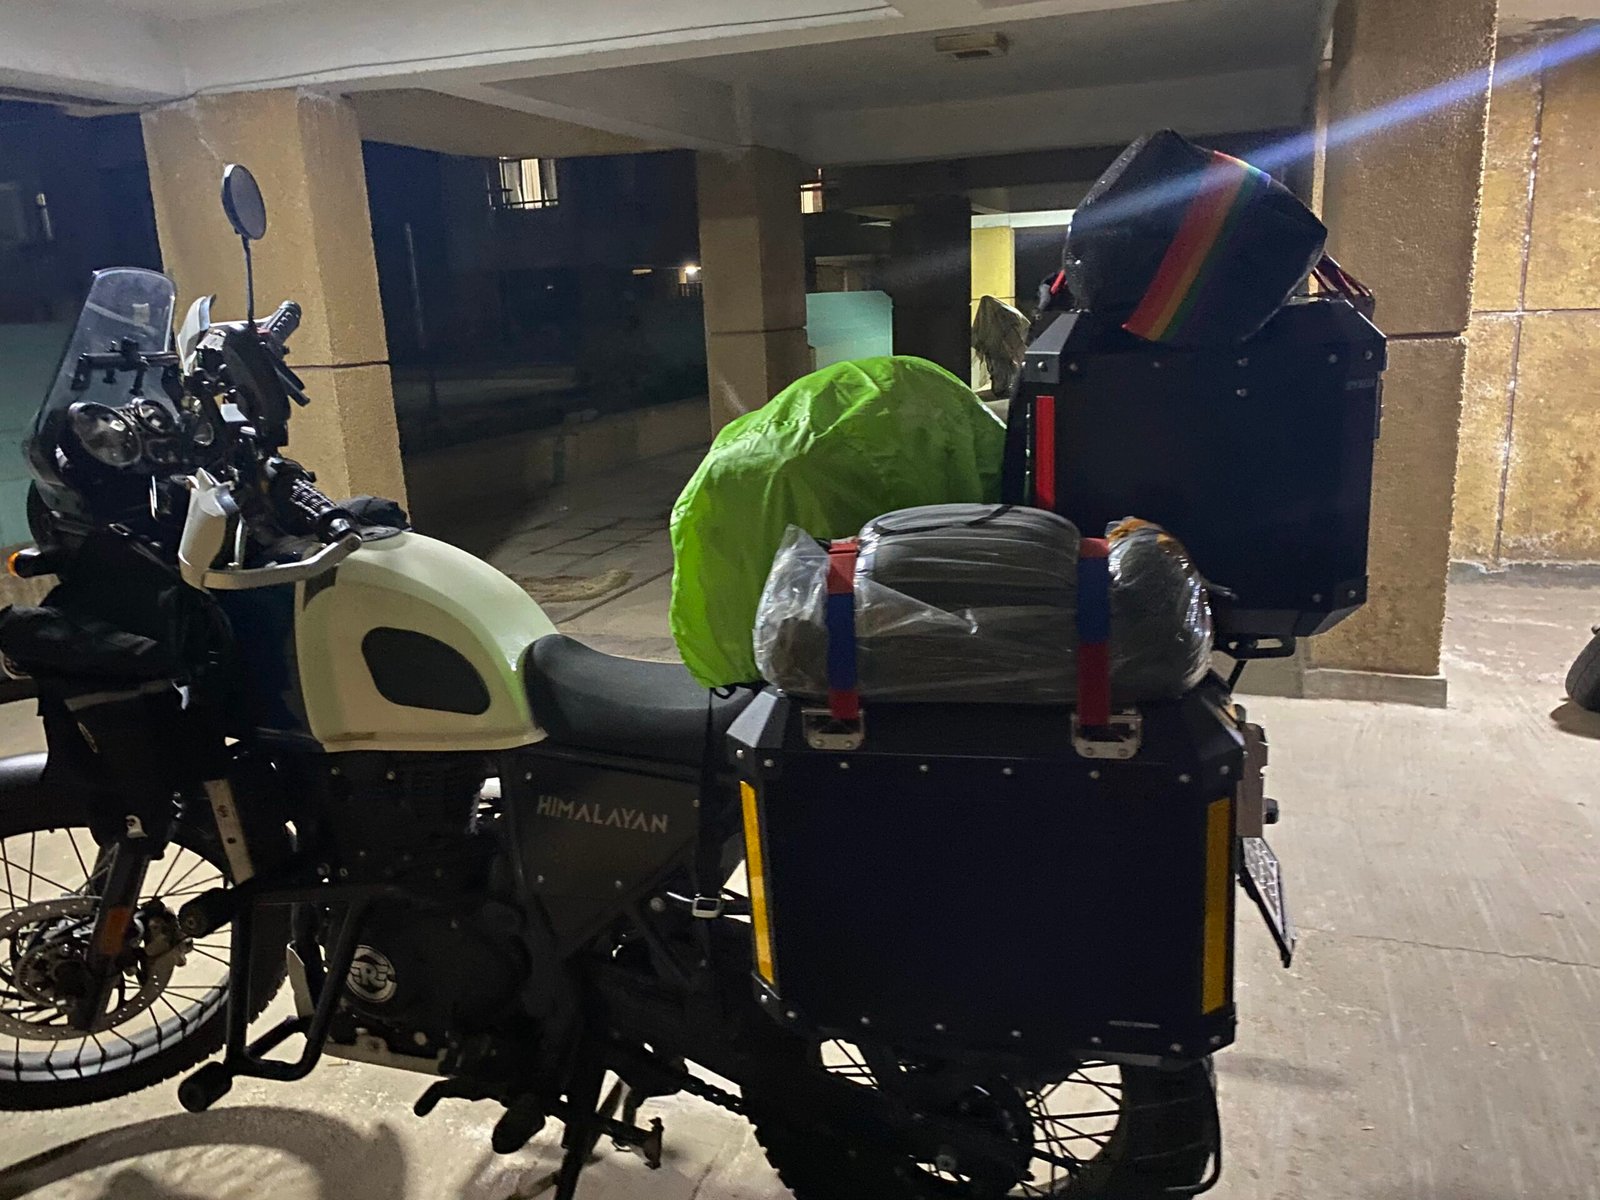
Luggage Architecture: Where to Put the Weight
How you mount your gear is as important as what you pack.
| Luggage Type | Best For… | Weight Rule |
| Tank Bag | Wallet, Phone, Camera, Snacks, Visor Cleaner. | Keep it light; don’t let it interfere with the handlebar’s full lock. |
| Saddlebags / Panniers | Heavy tools, spares, and shoes. | Crucial: Keep weight equal on both sides to avoid pulling the bike to one side. |
| Tail Bag | Clothes, sleeping bag, and lightweight items. | Secure it tightly over the pillion seat to keep weight close to the bike’s center. |
Pro Tip: The “Modular Cube” Strategy
Never throw loose items into a large bag; it becomes a “black hole” when you’re looking for a spare fuse in the rain.
- The Fix: Pack by category using Packing Cubes or Zip-Lock Pouches. Use one for “Electronics,” one for “Tools,” and another for “Medicine.” This organization allows you to find exactly what you need in seconds without unpacking your entire life on the side of the road.
- The Securement: Use Bungee Cords or Cargo Nets as secondary security, but rely on Rok Straps for your primary tie-downs; they don’t lose tension over bumps like traditional bungees do.
4. Technical Armor: Protecting the “Biological Engine”
Your riding gear is not merely clothing; it is a high-performance safety system designed to mitigate the risks of high-speed travel and harsh environments. In the unpredictable world of motorcycle touring—where road surfaces can change from smooth tarmac to jagged shale in a single curve—skipping safety gear is a gamble with your life. Professional riders view their gear as a “second skin” that manages impact, abrasion, and climate fatigue. If you aren’t geared up correctly, you aren’t tour-ready.
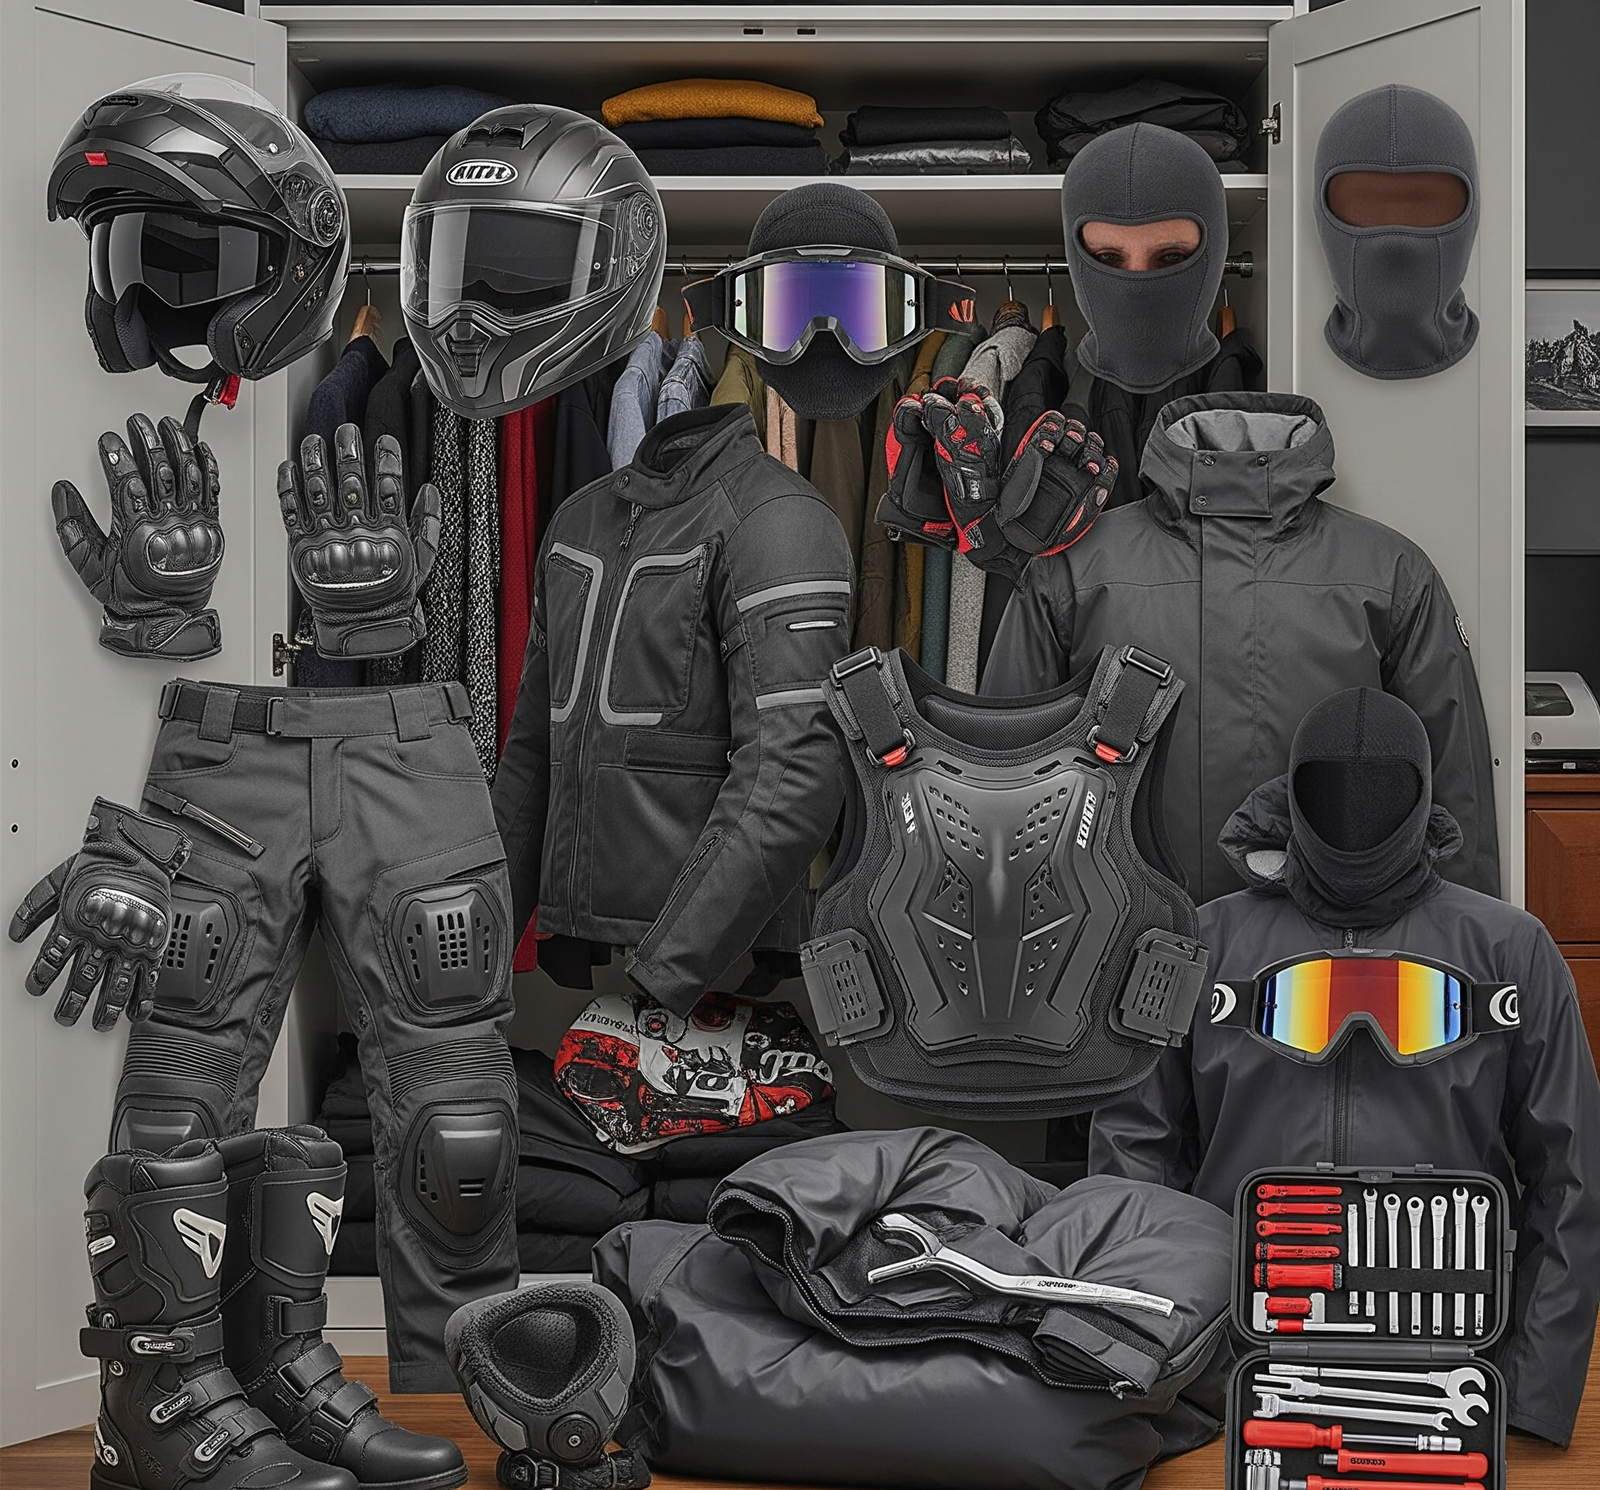
The Mandatory Armor Hierarchy
To ensure maximum survival and comfort, your gear must meet global safety standards and provide full-body coverage:
- The Crown Jewel (Helmet): Never settle for anything less than ISI, DOT, or ECE-certified full-face helmets. The helmet must fit snugly—if it moves when you shake your head, it won’t protect you. A certified helmet is your only defense against traumatic brain injury; ensure the visor is clear and the chin strap is always “D-ring” tight.
- The Upper Chassis (Jacket): Your jacket should be a fortress. Ensure it contains CE-rated armor at the elbows, shoulders, and back. In 2026, many seasoned riders also prioritize chest protectors, which guard against blunt force trauma during a chest-to-tank impact.
- The Lower Framework (Pants & Boots): Knee guards are a minimum, but dedicated riding pants offer superior abrasion resistance for your hips and thighs. Your boots must be ankle-high at a minimum, featuring reinforced toes and heels. A common injury in touring is the “foot-trap” under a falling bike—sturdy boots prevent crushed metatarsals.
- The Controls (Gloves): Your hands are your primary tools for survival. Use gloves with hard knuckle protection and, crucially, palm sliders. In a fall, the human instinct is to put hands out; palm sliders allow your hands to slide rather than “grab” the road, preventing wrist fractures.
The “Climate Shield” Protocol
Safety gear also plays a massive role in managing Environmental Fatigue, which is a silent killer of focus.
| Component | Strategic Addition | Why? |
| Visibility | Reflective Vest | Essential for night riding or heavy fog. Being seen is just as important as being protected. |
| Extreme Cold | Thermal Socks & Gloves | Frostbite starts at the extremities. In high altitudes, heated grips or thermal liners are a necessity. |
| Base Layers | Moisture-Wicking Fabric | Prevents sweat from chilling your core during descents, keeping your muscles supple. |
Pro Tip: The “Modular Layering” Strategy
If your journey takes you from hot plains to freezing mountain passes, do not carry one heavy jacket. Instead, use a three-layer system:
- A Base Layer to manage sweat.
- Your Armored Mesh/Textile Jacket for protection.
- A Windproof/Waterproof Outer Shell (Rain Jacket) to trap heat when the temperature drops.
- This allows you to add or subtract layers in seconds as the terrain changes, ensuring your body temperature stays stable and your reaction times stay sharp.
5. Documents Checklist
| Document | Tip |
|---|---|
| Driving license | Carry physical & digital copies |
| Vehicle RC & Insurance | Ensure valid insurance + PUC |
| Aadhar card / Passport | Carry ID proof for hotel check-ins |
| Permits (e.g., Inner Line) | For Leh, Spiti, Arunachal, Sikkim, etc. |
| International license (Check latest requirements) | If crossing borders (Nepal/Bhutan) |
✅ Pro Tip: Keep a laminated copy in your tank bag for quick access during checks.
6. Mentally & Physically Prep
6. Bio-Hacking the Ride: Conditioning the Human Component
We often spend weeks tuning our engines and cleaning our chains, but the most sophisticated piece of machinery on any tour is the rider. Mental and physical preparation isn’t just about “fitness”—it’s about fatigue management. In the unforgiving terrain of a long-distance tour, a tired mind makes slow decisions, and a stiff body lacks the agility to react to hazards. To ensure your journey remains a joy rather than an endurance test, you must prime your “biological engine” to handle the unique stresses of the saddle.
The Pre-Departure “System Check”
To arrive at the starting line in peak condition, follow these four pillars of human prep:
- The Sleep Bank: Never start a tour in a “sleep deficit.” Aim for 7–8 hours of uninterrupted rest for at least three nights before your departure. Riding while sleep-deprived mimics the cognitive impairment of being over the legal alcohol limit. Deep sleep is when your brain flushes out toxins and sharpens the reflexes you’ll need for mountain hairpins.
- Pre-emptive Hydration: If you start drinking water only when you feel thirsty, you’re already dehydrated. Start increasing your water intake 48 hours before the ride. Proper hydration keeps your joints lubricated and prevents the “altitude headaches” that plague riders in thinner air.
- Mobility Prep: Long hours in a static riding position lead to “compartment syndrome” and muscle shortening. Focus on dynamic stretches for the hip flexors, hamstrings, and neck. A flexible rider can move with the bike, absorbing bumps through their legs rather than their spine.
- The Weight-Stress Simulation: If you are new to touring, the biggest shock isn’t the distance—it’s the balance. Practice 50–100km “shakedown rides” with your bike fully loaded with luggage. A weighted bike handles differently in slow-speed turns and under heavy braking; you need to build that muscle memory before you hit the open road.
7. The Digital Cockpit: Mastering Electronics and Navigation
A rider’s electronics are more than just gadgets; they are the “nervous system” of the journey, providing critical data, communication, and safety links. However, the open road is a hostile environment for technology—subjecting devices to relentless vibration, dust, and extreme temperatures. A “Tour-Ready” electronics setup must be rugged, redundant, and, above all, non-distracting. Your goal is to create a seamless digital interface that assists your ride without pulling your focus away from the road surface.
The Tech Manifest
- The Primary Navigator (Mobile Setup): Your smartphone is your most powerful tool, but it is also fragile. Use a vibration-dampened mount (like those from QuadLock or Peak Design). Modern smartphone cameras feature delicate Optical Image Stabilization (OIS) that can be permanently shattered by the high-frequency buzz of a motorcycle engine. A dampened mount acts as a “shock absorber” for your phone’s internal sensors.
- The Power Grid: Constant GPS usage and screen brightness drain batteries rapidly. Ensure your bike has a hard-wired USB charging port with a waterproof cover. As a redundancy, always keep a high-capacity power bank in your tank bag; if your bike’s electrical system fails, your phone (and your ability to call for help) must stay alive.
- Network Independence (Offline Maps): Never rely on “bars” in the wilderness. Before leaving, download Offline Maps for your entire route. GPS signals rely on satellites, which work even in “No Service” zones, but the map data itself must be stored locally on your device to be useful.
- The Communication Link (Bluetooth Intercom): A helmet-mounted headset (like Cardo or Sena) is essential for receiving turn-by-turn navigation prompts and maintaining a link with your group. Ensure it is fully charged and paired before you put on your gloves. In 2026, Mesh technology allows you to stay connected to your crew even over long distances and through mountain bends.
- Memory Capture (Action Cameras): If using a GoPro or 360-degree camera, treat it as a secondary priority. Mount it securely and use a remote or voice command to start recording. The best memories are those you experience first-hand, not those you spend the whole ride trying to frame on a screen.
8. The Survival Strategy: Your Emergency & Safety Protocol
On the road, hope is not a strategy. An emergency kit is the one thing you pack praying you never have to use, but when a crisis strikes—be it a mechanical failure, a medical issue, or a navigational error—this kit becomes your lifeline. In remote regions where “network” is a luxury and the nearest town is hours away, self-sufficiency is your greatest asset. A professional safety kit isn’t just about the items; it’s about having the right tools to maintain control when things go wrong.
The Tactical Safety Manifest
- The Medical Response (First-Aid): Your kit should be geared toward “Trauma and Stabilization.” Include antiseptic wipes, sterile gauze, medical tape, and painkillers. More importantly, ensure you have rehydration salts (ORS) and any personal prescription medications. In 2026, a compact tourniquet is also a recommended addition for serious remote-area expeditions.
- The “Mechanical Rescue” (Tools & Puncture): Most roadside issues are simple. Your tool kit should include the specific wrenches for your bike’s axles, a multi-tool, and a plug-style puncture kit with a portable inflator. Being able to fix a flat tire in 15 minutes is the difference between a minor delay and being stranded overnight.
- The Night-Ops Kit (Torch & Batteries): If you break down at dusk, a high-lumens headlamp is mandatory. It allows you to work on your bike or navigate a trail with both hands free. Always carry a spare set of batteries or ensure your light is USB-rechargeable via your power bank.
- Analog Redundancy (Paper Maps): Electronic devices fail—they freeze in the cold, break in falls, or run out of battery. A physical paper map of the region, tucked into a waterproof sleeve, is your “fail-safe” for when the satellites or screens let you down.
- Personal Security: If you are solo touring in highly isolated stretches, carrying pepper spray in an easy-access pocket (like a riding jacket’s forearm or chest pocket) provides an extra layer of peace of mind against aggressive wildlife or rare security concerns.
9. Food & Hydration Tips
Your body is the primary processor of every input the road throws at you. In the world of motorcycle touring, food is not just a meal; it is fuel for cognitive performance. The common “road trip” habit of indulging in heavy, greasy highway snacks is a recipe for disaster. Such meals divert blood flow away from your brain to your stomach, leading to “post-lunch lethargy” and dangerously slow reaction times. To maintain a sharp edge from sunrise to sunset, you must adopt a strategy of continuous micro-fueling and consistent hydration.
The Rider’s Dietary Architecture
- The “Steady-Burn” Snack Pack: High-altitude and long-distance riding burn calories faster than you realize. Instead of waiting for a big lunch, keep protein bars, trail mix, or dry fruits in your tank bag. These offer a combination of healthy fats and slow-release proteins that keep your blood sugar stable, preventing the “jitters” or energy crashes that can lead to poor throttle control.
- The “Clear Mind” Hydration Strategy: Dehydration is the leading cause of “vibration headaches” and muscle cramps. Always carry a reusable water bottle or a hydration pack. The goal is to drink small amounts frequently. If you feel thirsty, you are already 10% dehydrated. In 2026, many riders add a pinch of Himalayan salt or an electrolyte sachet to their water to replace the essential minerals lost through sweat and heavy breathing in dry mountain air.
- The “Light & Lean” Lunch: Avoid “The Food Coma.” During your midday stop, skip the heavy fried foods, creamy curries, or large portions of white rice. Opt for a light, balanced meal—think grilled proteins, simple dals, or a light sandwich. The lighter your stomach, the more blood stays available for your brain to process high-speed visual data.
- The Stimulant Trap: While a cup of “Chai” or coffee is a great ritual, avoid over-reliance on sugary energy drinks or excessive caffeine. These provide a sharp “spike” followed by a devastating “crash.” Caffeine is also a diuretic, which will accelerate dehydration in the high-altitude sun.
10. Final Day Checklist (The Night Before Ride)
- ✅ Tyres & fuel tank checked
- ✅ Documents in place
- ✅ Clothes packed and waterproofed
- ✅ Phone fully charged
- ✅ Route double-checked
- ✅ Alarm set (and backups!)
Optional Add-ons
- GPS tracker or AirTag for your luggage
- Extra key hidden on the bike
- Camping gear (if going remote)
- Foldable chair/stool
- Earplugs for wind noise on highways
Note: If you are planning exclusively for Ladakh trip then please, refer our Ladakh ride preperation blog here
I hope this comprehensive guide has provided you with the clarity and confidence needed to kickstart your motorcycling journey. My goal is to help you navigate the steep learning curve of the road so you can focus on what truly matters: the joy of the ride.
If you found these insights helpful, there is much more to explore. From deep dives into specific gear reviews to tactical route planning and advanced riding techniques, I’ve curated a wealth of knowledge to keep you moving forward.
Take the Next Step: For more expert tips, gear breakdowns, and adventure stories, be sure to explore our full library of resources on the Guides Page and Blogs Page.
Related Posts
What you need for Motorcycle camping ?
At its heart, a motorcycle camping expedition is fueled by…
The Rider’s Shield: A Definitive Guide to Essential Protection
Motorcycle touring is a delicate dance between man, machine, and…
The Great Debate: Solo Exploration vs. Collective Adventure
Motorcycle touring is a deeply personal endeavor, often serving as…