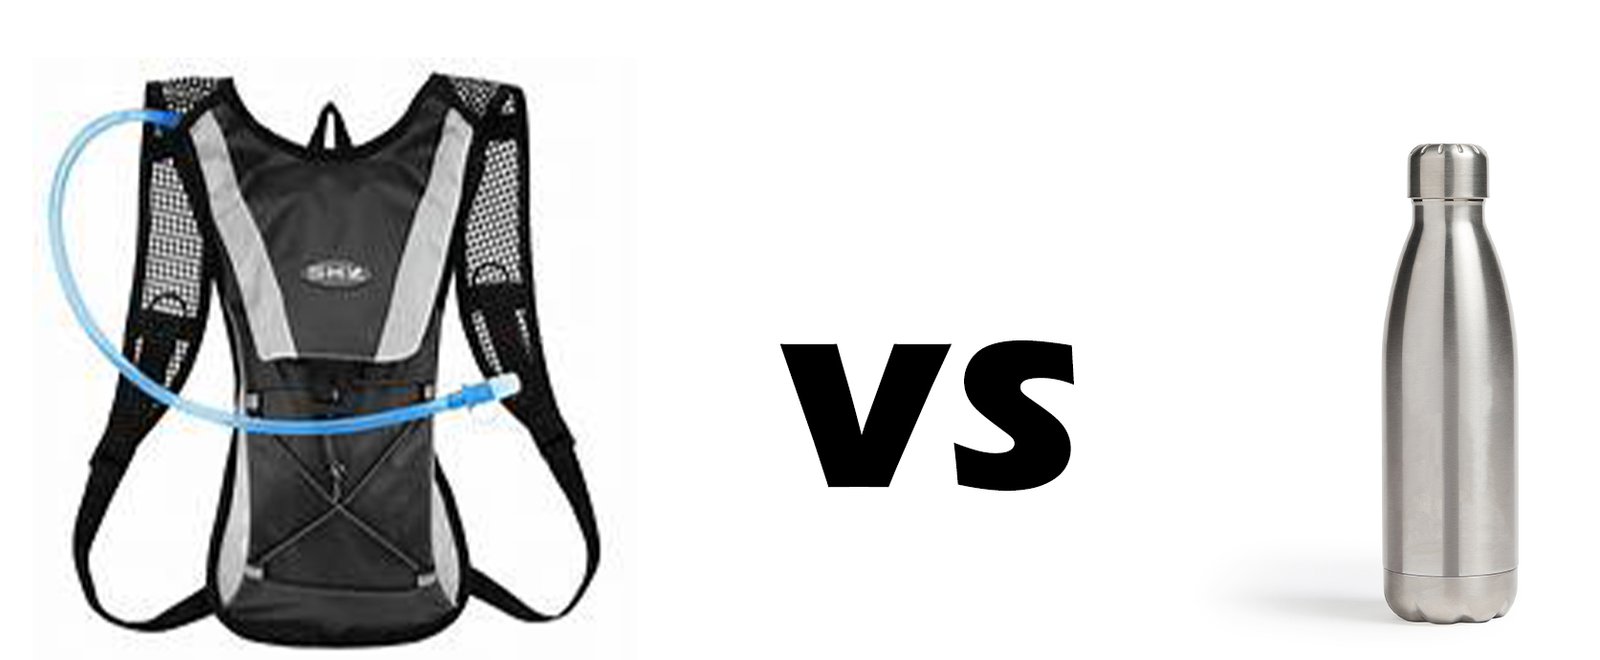
If you primarily travel by car, the choice is simple: a standard water bottle is undoubtedly your best companion. However, for those who trade four wheels for two, the question of hydration becomes a tactical decision. Drawing from years of long-distance riding and grit-filled expeditions, I’ve curated this guide to settle the debate. If you find yourself torn between the simplicity of a water bottle and the efficiency of a hydration bladder (camelback) for your weekend sprints or cross-country tours, you have come to the right place.
The Rider’s Dilemma: Why It Matters
In a car, reaching for a drink is a minor distraction; on a motorcycle, it is a logistical challenge. Proper hydration is the silent defender against fatigue, muscle cramps, and diminished reaction times. When the sun is beating down and the wind is stripping moisture from your skin, how you carry your water can define the success of your ride.
The Weekend Warrior vs. The Long-Haul Tourer
- Short Weekend Rides: These often involve frequent stops at cafes or scenic overlooks, where a bottle might suffice.
- Long-Distance Tours: These demand “on-the-move” hydration to maintain focus over 400km–600km days.
Why Experience is the Best Teacher
This information isn’t just theory; it is the result of thousands of kilometers spent in the saddle. I have faced the frustration of fumbling with tank bag zippers to reach a bottle while wearing thick gloves, and I have experienced the convenience of a hands-free straw during a technical mountain climb.
In this guide, we will break down:
- Accessibility: Can you drink without stopping the bike?
- Capacity: How much weight are you willing to carry on your back vs. the bike?
- Hygiene & Maintenance: Which system is easier to keep clean on the road?
- Temperature Control: Which one keeps your water cool during a desert crossing?
The Lifeblood of the Ride: Why Water is Your Most Critical Gear
Regardless of whether you are crossing a sun-scorched desert or climbing a freezing mountain pass, water is not just a luxury—it is a physiological necessity. I have witnessed riders pushing through grueling hours without a single sip of water; this is a dangerous gamble with your safety. When you ride, your body and mind are in a state of constant exertion. You are losing fluids through “invisible” sweating both internally and externally. In the high-stakes environment of motorcycling, staying hydrated is the difference between a sharp, responsive mind and a fatigued, life-threatening lapse in judgment.
The “Microclimate” of Riding Gear
A common misconception is that if it isn’t “hot” outside, you aren’t losing water. However, the reality of protective gear tells a different story:
- The +3 Degree Rule: Full riding gear—leather or textile—creates a personal “microclimate” around your body. This environment is typically 2-3°C higher than the ambient temperature. This “sauna effect” triggers continuous perspiration as your body struggles to regulate its temperature.
- Evaporative Dehydration: At highway speeds, the wind strips moisture from your skin so quickly that you may not even feel “sweaty,” leading you to believe you are hydrated when you are actually losing fluids at an alarming rate.
Hydration in Extremes: Heat vs. High Altitude
- Summer Survival: In the heat, hydration is your primary defense against Heat Exhaustion. Water allows your body to produce the sweat required to cool you down. Without it, your core temperature can spike, leading to dizziness, nausea, and fainting.
- Winter & High Altitude: In cold weather or high altitudes (like the Himalayas), the air is incredibly dry. Your body needs more water to help your blood carry oxygen efficiently to your brain and muscles. Dehydration at altitude is a leading trigger for Altitude Sickness, making water intake critical even when you don’t feel “thirsty.”
The “Swiss Army Knife” of Fluids
Beyond keeping you alive, carrying a surplus of water provides a tactical advantage in adverse situations. Water on a motorcycle is a multi-purpose tool:
- First Aid: It is essential for cleaning wounds or road rash after a minor slide to prevent infection.
- Mechanical Help: It can be used to clean a mud-caked visor, wash grime off your hands after a roadside repair, or even top up a cooling system in an emergency.
- Trail Solidarity: Carrying extra water allows you to help a fellow rider who may have underestimated their own needs.
Water Carrying Options: Choosing Your Reservoir
On a motorcycle, your capacity to carry water is dictated by your luggage setup and your personal comfort. Unlike a car, where you can simply toss a gallon jug onto the passenger seat, a rider must choose a system that stays secure at high speeds and remains accessible through a helmet. There are three primary ways to carry your life-sustaining fluids:
1. The Traditional Water Bottle (500ml – 1L)
The most common and affordable option. Whether it’s a reusable stainless steel flask or a standard PET bottle, this is the “baseline” for every rider.
- Storage: Usually tucked into a tank bag side pocket, a pannier, or secured with a bottle holster on the crash bars.
- Pros: Extremely easy to refill at gas stations, easy to clean, and you can clearly see how much water you have left.
- Cons: Requires you to stop the motorcycle, remove your gloves, and often remove your helmet to take a drink. This can lead to “dehydration by procrastination”—where you skip drinking because stopping is too much effort.
2. Collapsible Water Bags (2L – 5L)
These are heavy-duty, flexible bladders designed for bulk storage rather than immediate sipping. Think of these as your “backup tank.”
- Storage: Typically stowed flat inside a pannier or strapped to the top of your rear luggage.
- Pros: Massive capacity for long stretches through dry zones (like Ladakh or Rajasthan). Because they are flexible, they take up less space as they empty.
- Cons: Not accessible while riding. They are meant for use at camp or during long rest breaks to refill your primary drinking source.
3. Over-the-Shoulder Hydration Bags (1L, 2L, or 3L)
Often called “Camelbacks,” these are backpacks containing a flexible bladder with a long drinking tube that clips to your shoulder.
- Storage: Worn directly on your back or, for more comfort, strapped to a tank bag or tail bag with the tube extended toward the rider.
- Pros: Hands-free hydration. You can slip the bite-valve under your helmet and sip water while cruising at 100 km/h. This encourages frequent “micro-sipping,” which is the most effective way to stay hydrated.
- Cons: Can cause shoulder fatigue on 10+ hour rides if worn on the back. They also require more diligent cleaning to prevent mold in the tube.
Comparison: Which One Should You Pick?
| Option | Best Use Case | Effort Level | Capacity |
| Bottle | Short city hops / Weekend cafe runs | High (Must stop) | Low |
| Water Bag | Multi-day expeditions / Camping | Medium (Refill tool) | Very High |
| Hydration Bag | Long-distance touring / Off-roading | Low (Sip on the go) | Moderate |
The Water Bottle: Simplicity with a Logistical Cost
The humble water bottle is the most accessible hydration tool, but carrying it on a motorcycle presents unique challenges. Unlike a car’s cupholder, a bike offers no inherent space for a bottle. Unless your luggage or crash bars are equipped with dedicated holsters, you are constantly battling a lack of real estate. While it remains the most budget-friendly and “sharable” option, the weight, durability, and risk of loss make it a more complex choice than it first appears.
The Practical Hurdles of Bottle Carry
1. Material Matters: Plastic vs. Metal
- Plastic Bottles: Light and inexpensive, but they lack durability. Under the vibration and heat of a long ride, they can crack or leach chemicals, making them an unhealthy long-term solution.
- Metal Bottles: Highly durable and better for the environment, but the added weight of stainless steel can become a factor when you are trying to keep your bike’s center of gravity light.
2. The “Stall & Fall” Risk
Many riders mount metal bottles to their crash guards for easy access. However, there is a hidden danger here:
- The Damage Factor: If you drop the bike or have a minor stall, a rigid metal bottle can act as a “lever” or a hard point that actually dents your tank or damages your engine casing upon impact. I have seen many beautifully maintained bikes ruined by a simple water bottle during a slow-speed tip-over.
- Heat Exposure: If mounted too close to the engine, your “refreshing” water can quickly reach near-boiling temperatures, making it undrinkable.
3. The “Left Behind” Syndrome
Bottles are nomadic by nature. Because you have to physically remove them from the bike during a break, they are incredibly easy to lose.
- The Restaurant Trap: We’ve all done it—you place the bottle on the table during a lunch break and ride away without it. Unlike a hydration bag that is integrated into your gear, a bottle requires a high level of “inventory management” at every stop.
The Tactical Breakdown
| Feature | The Reality |
| Cost | Superior: Often free or very cheap; easily replaceable anywhere in the world. |
| Sustainability | Mixed: Single-use plastic is convenient to discard but terrible for the planet; metal is eco-friendly but heavy. |
| Versatility | High: Easy to share with a thirsty fellow rider or use for washing a visor. |
| Convenience | Low: Requires a full stop, glove removal, and helmet adjustment to use. |
The Water Bag: The Expedition Tool for the Campsite
In the world of everyday motorcycling, large-capacity water bags (ranging from 2L to 5L) are rarely the first choice for drinking water. Their sheer size and weight make them cumbersome to store on a bike, and their “floppy” nature makes them difficult to secure without a rigid container or pannier. However, for the moto-camper, the water bag is an indispensable piece of tactical gear. It isn’t meant for sipping while you ride; it is meant for “bulk logistics” once you’ve reached your destination.
The Strategy: Carry Empty, Use Full
The secret to using a large water bag effectively is to treat it as an on-demand resource rather than part of your active load. Most experienced adventure riders will not carry 5 liters of sloshing water over 300km of highway—the weight is simply too destabilizing.
- The Lightweight Transit: Keep the water bag rolled up and empty inside your luggage during the day. It takes up almost zero space and adds no weight.
- The “Last Mile” Fill: As you approach your campsite or enter a remote wilderness area where water is scarce, stop at the last reliable source (a mountain stream, a village well, or a petrol station). Fill the bag then, and strap it to the top of your luggage for the final few kilometers to your camp.
- The Camp Reservoir: Once at the site, the water bag becomes your “kitchen tap”—providing ample water for cooking, cleaning utensils, and extinguishing your campfire.
Why Not for Non-Camping Trips?
For the “highway tourer” who stays in hotels or the “weekend rider” heading to a café, the water bag is unnecessary “overkill.”
No “On-the-Go” Access: You cannot drink from these without stopping and unpacking, making them useless for maintaining hydration while in motion.
Lack of Structure: Without a dedicated harness, a 5L bag of water is essentially a “heavy balloon” that can shift your bike’s balance in corners.
The Hydration Bag: A Strategic Investment in Performance
While technically a subset of water bags, the Hydration Bag (or Hydration Pack) belongs in a category of its own due to its specialized purpose. Engineered specifically for the active rider, it consists of a flexible internal bladder (typically 1L to 3L) housed within a sleek, ergonomic backpack. With a dedicated drinking tube—or “spout”—that reaches your mouth, it allows for seamless hydration without ever breaking your focus or your pace. While the initial cost may seem high, for the serious tourer, the “value-per-kilometer” is unmatched.
The Cost vs. Value Analysis
A quality hydration bag is an investment, typically ranging from ₹1,500 to ₹5,000+ depending on the brand, material, and features. To a casual rider, spending ₹3,000 just to “carry water” might seem excessive. However, you aren’t just paying for a water container; you are paying for ergonomics, safety, and efficiency.
Why It’s Worth the Investment:
- Hands-Free Availability: The primary value is the ability to drink while moving. This keeps your hydration levels consistent, preventing the fatigue and headaches that ruin long rides.
- Integrated Storage: Beyond water, these bags offer specialized compartments for your wallet, sunglasses, travel documents, and action camera accessories.2 It becomes your “essential items” hub.
- Superior Weight Distribution: Carrying 2L of water in a balanced bladder on your back is significantly less taxing on your body than carrying two 1L bottles swinging in a bag or strapped awkwardly to the bike.
- The “Back Protector” Bonus: In the event of a fall, a water-filled bladder acts as a soft cushion. It won’t dent your bike like a metal bottle, and it can actually help absorb some of the impact on your back.
The Tactical Breakdown
| Feature | The Hydration Bag Advantage |
| Ease of Use | Highest: Sip water through the tube without removing gloves or your helmet. |
| Durability | High: Built with heavy-duty fabrics and leak-proof bladders designed to last years. |
| Refilling | Simple: Most feature wide-mouth openings for easy filling at any rest stop. |
| Ergonomics | Balanced: Designed to fit over riding jackets with adjustable chest and waist straps. |
Conclusion: Choosing Your Hydration Legacy
Deciding between a water bottle and a hydration bag isn’t a one-size-fits-all choice; it is a personal decision based on your riding style, distance, and philosophy. However, beyond the logistics of “how” you drink, there is a larger responsibility we share as riders: protecting the very environments we love to explore. Whether you choose the tactical efficiency of a bladder or the simplicity of a bottle, the goal remains the same—stay hydrated, stay alert, and minimize your footprint on the road.
The Sustainability Mandate: Say No to Plastic
As motorcyclists, we are witness to the beauty of the outdoors, which makes it our duty to preserve it.
- The Environmental Choice: Avoid single-use plastic bottles at all costs. They are an ecological disaster and a health compromise.
- The Better Path: If you prefer a bottle, commit to a high-quality metal/stainless steel version. If you want the ultimate convenience, invest in a hydration bag. Both options are “one-time purchases” that save the planet from hundreds of discarded plastic bottles over your riding career.
Finding the “Sweet Spot” in Value
You don’t need to spend a fortune to get professional results.
- The Entry-Level Hero: For riders looking for high value without the “premium brand” markup, Decathlon offers excellent hydration bags starting around ₹1,500.
- My Personal Experience: I have been using a Decathlon hydration pack for the last three years, and it has handled every mile with ease.
- The Philosophy of Spending: Unless a premium bag offers a specific high-end functionality you absolutely need (like extreme insulation or ballistic-grade fabric), there is no need to overspend. A mid-range, durable bag provides everything a tourer needs while keeping your budget intact for fuel and gear.
Pro Tips
The “After-Ride” Ritual
To make your hydration bag last for years, you must prevent mold from growing in the tube.
- The Fix: After every trip, wash the bladder with mild soap, rinse it, and hang it upside down with the cap open to dry completely. For the tube, use a small cleaning brush or simply blow out all the excess moisture. Taking five minutes to dry your gear ensures it’s fresh and ready for your next sunrise departure.
The “Insulation” Trick
On scorching summer rides, even a hydration bag can’t prevent the water in the tube from getting warm.
- The Fix: After taking a sip, blow air back into the tube to push the remaining water back into the insulated bladder. The next time you take a sip, you’ll get the cold water from the reservoir instead of the hot water that was sitting in the exposed pipe.
The “Gravity Shower” Hack
If you are carrying a high-capacity water bag for camping, look for one with a wide-mouth opening or a detachable nozzle.
- The Fix: If you hang a dark-colored water bag from a tree branch in the late afternoon sun, the water will absorb the heat. By the time you’ve set up your tent, you have a solar-heated “gravity shower” or warm water for washing dishes, which is a massive luxury in the cold mountain air.
The “Tether” Technique
If you prefer using a bottle, don’t just “drop” it into a side pocket where it can vibrate out on a bumpy road.
- The Fix: Use a small carabiner or a bungee cord to tether the neck of the bottle to your bag or holster. This prevents the bottle from “launching” off the bike when you hit a pothole and ensures that even if it slips out of the pocket, it stays attached to the machine.
The “Dual-System” Strategy
Experienced tourers rarely rely on just one method.
- The Strategy: Use a 2L Hydration Bag for your primary “on-the-go” drinking to stay alert while riding. Supplement this with a 1L Insulated Bottle filled with electrolytes or ice-cold water for your scheduled breaks. This ensures you have a backup if the hydration bag leaks and gives you a “refreshing reward” when you finally pull over.
The “Urine Color” Test
Since thirst is a lagging indicator (by the time you’re thirsty, you’re already 2% dehydrated), you need a better metric.
- The Rule: Monitor your urine color during your rest stops.
- Pale Straw/Clear: You are perfectly hydrated and “Riding Ready.”
- Dark Yellow/Amber: You are severely dehydrated. Stop immediately, find shade, and sip water (ideally with electrolytes) for 30 minutes before getting back on the bike.
The “Thirst” Trap
By the time you actually feel thirsty on a motorcycle, you are likely already slightly dehydrated.
- The Strategy: The goal of a professional hydration setup is to allow for “Micro-Sipping”—taking small sips every 15–20 minutes rather than chugging a liter of water every two hours. This keeps your energy levels stable and prevents the “bloated” feeling that comes from over-drinking during a rest stop.
I hope this comprehensive guide has provided you with the clarity and confidence needed to kickstart your motorcycling journey. My goal is to help you navigate the steep learning curve of the road so you can focus on what truly matters: the joy of the ride.
If you found these insights helpful, there is much more to explore. From deep dives into specific gear reviews to tactical route planning and advanced riding techniques, I’ve curated a wealth of knowledge to keep you moving forward.
Take the Next Step: For more expert tips, gear breakdowns, and adventure stories, be sure to explore our full library of resources on the Guides Page and Blogs Page.
Related Posts
Group Riding Etiquette for Beginners
Ride Together, Ride Better: The Art of Synchronized Touring Group…
Beginner’s Guide to Motorcycling
Beginner's Guide to Motorcycling Stepping into the world of motorcycling…
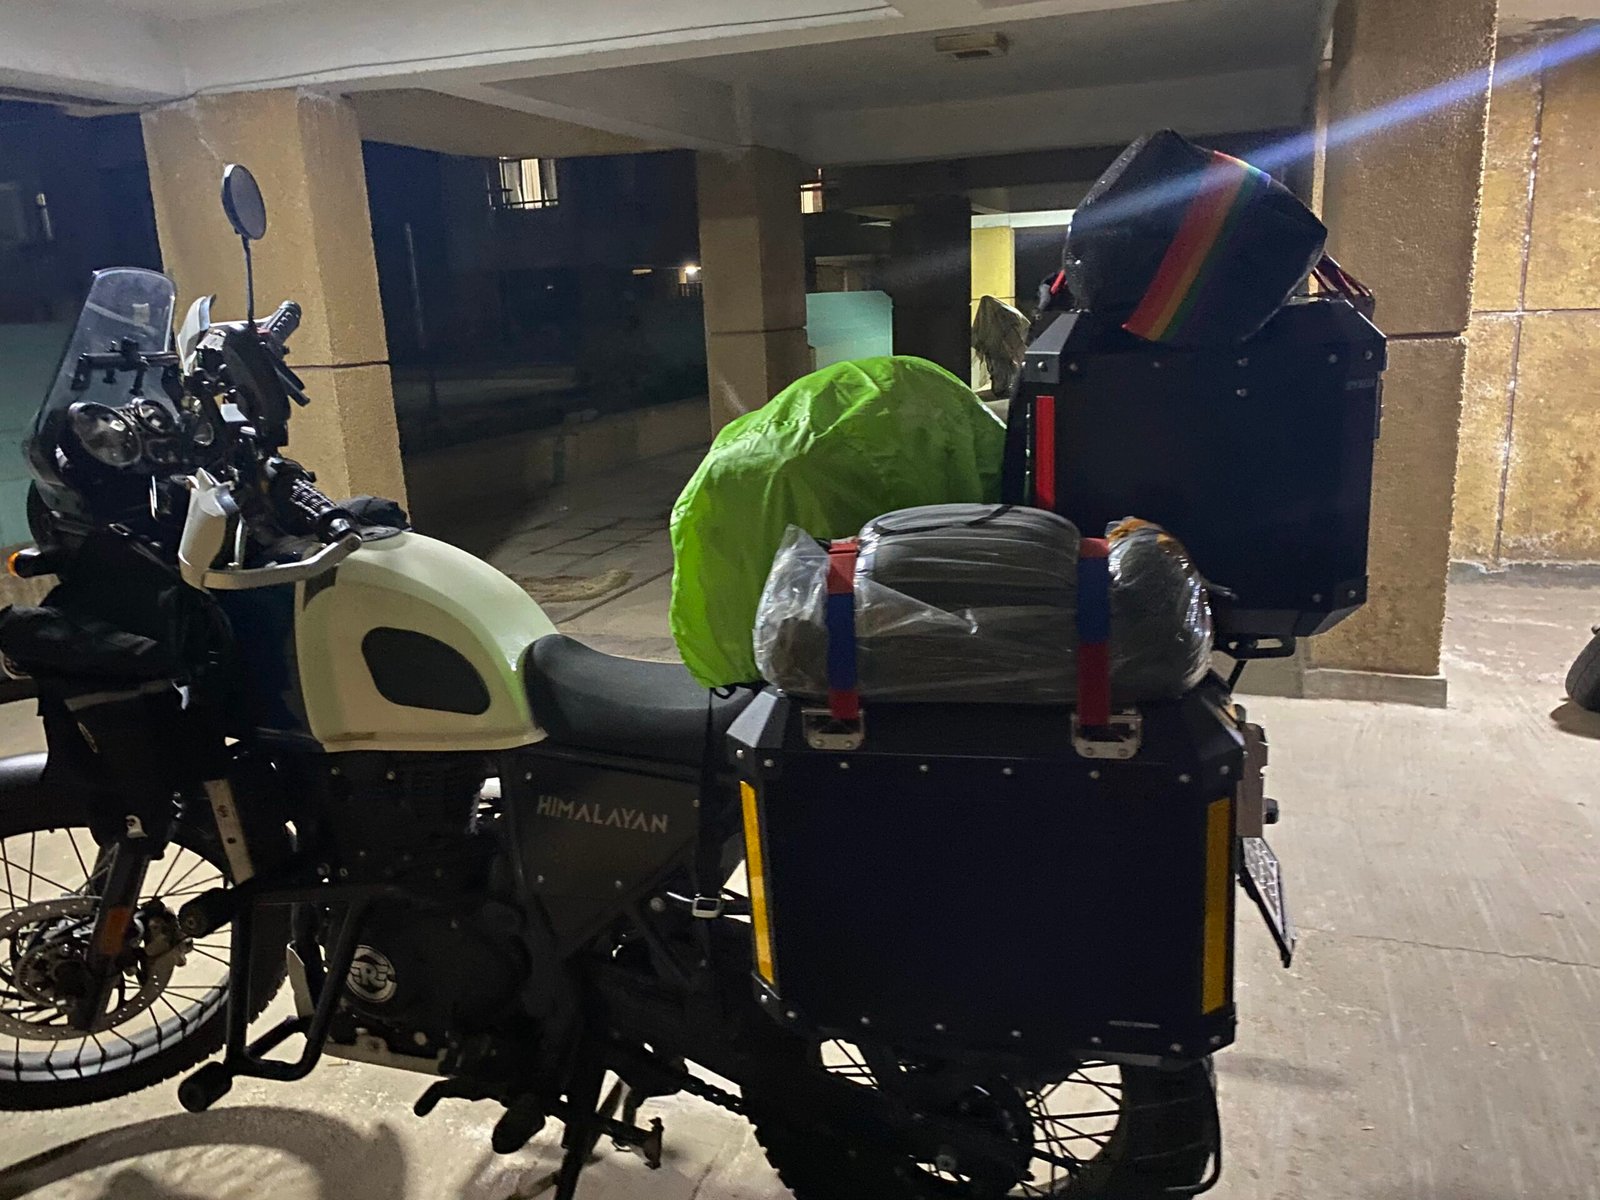
What you need for Motorcycle camping ?
At its heart, a motorcycle camping expedition is fueled by…